You could well be creating the greatest blogs possible for your business on a regular basis....
You’ve just written a blog in HubSpot’s blogging tool. You may have written it in composer mode and then edited it. You’ve optimised your blog, added a feature image with alt text, put your keywords in, added internal links, selected your campaign, your author, your editing team says it’s good to go, and you want to publish it. Here’s a quick guide (with pictures) on how to schedule and share a blog with HubSpot.

Using Composer Mode
You can paste your text in, import from Google Docs, or simply begin writing in the composer mode. Once you’re happy and you’ve added your links, H2s, H3s, bullet points, numbered lists, and whatever other components you want, you can click next.
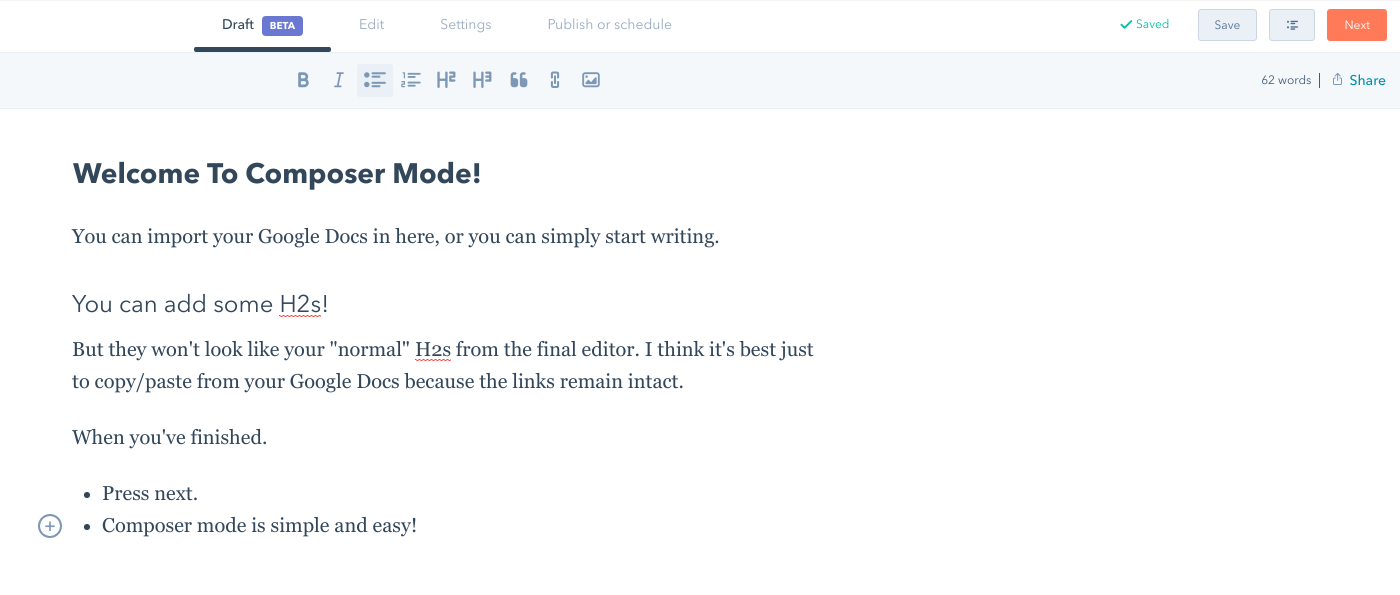 Tip: I wouldn’t recommend using the numbered list tool because it doesn’t always format properly using your template, and I’d add the images in the next screen instead.

Clicking next will take you to the screen above to start editing. The next page will be the WYSIWYG editor.
Final Blog View Screen and Optimising Your Blog
Click “start editing” and it’ll take you to what your blog will look like in the final version. Don’t worry! You can add some more flair in the next screen.
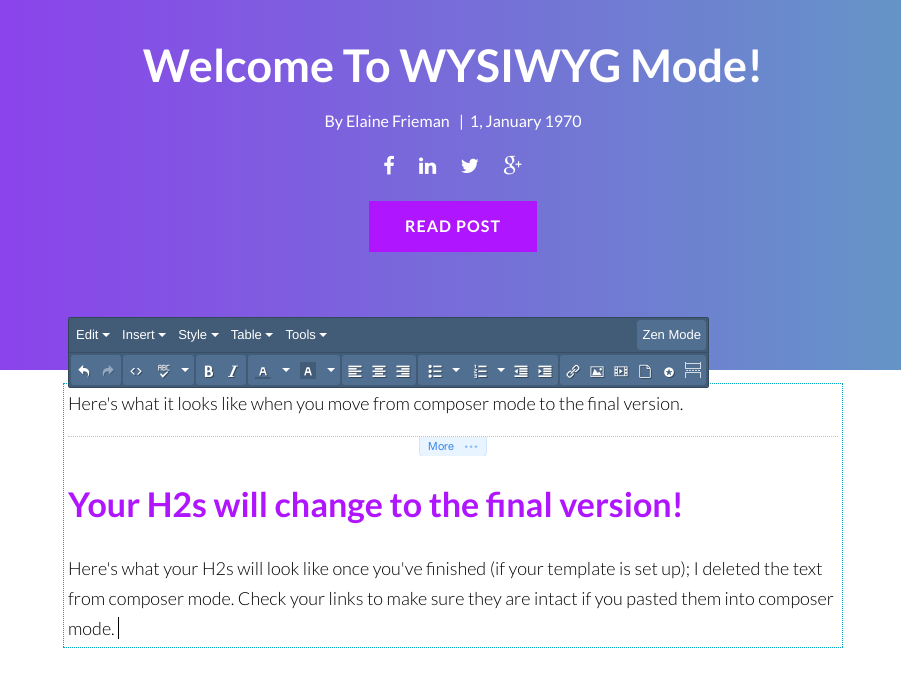
Before I begin writing, I usually go to the settings tab to add in my information:


Then, I go over to the “Optimize” tab and add keywords (we usually only use one), and it analyses the blog’s effectiveness. It’ll let you know if you’re overusing keywords, if you have images with alt text, if you have a CTA, if you have enough internal links, if your meta description is okay, it’ll advise you to use keywords in the meta description and somewhere in the blog (usually the opening paragraph).
HubSpot has a helpful tool that says, “Explore some internal links you might use in this blog post.” If you have links on your blog, it’ll suggest some you can use. If you don’t then you can go back in later and add them. Creating internal links is important for Google relevance. Be sure to use appropriate anchor text that tells Google (and the reader) what will be contained in the linked blog.
Scheduling or Publishing the Blog Post
Click on the "Publish or schedule" tab to publish or schedule; it's really that easy! Once it's set up, hit the orange "Publish" button in the top right hand corner.

Click the “Publish” button to publish now, or you can schedule for later.
 Select the time you want the post to be published.

You can choose any date and time in the future.
 Tip: You can hit “publish now” and then go back and edit your post and change the date and time to any date in the past as well.

Once you’re happy with the date and time of the future publication date, hit the orange button!

This screen will pop up and then press “Schedule Post Now.” It will take you to an analytics and performance screen.

Share Socially
If you look at the image above, you can see a “Share” button next to the “Edit” button. Once you press the “Share” button HubSpot social integration tools will pull up and the blog link will be auto populated for social media sharing.

If you click on the “Facebook” circle, for example, it’ll auto populate the link and the image and give you a place to write your social message. Hit the plus sign on any platform to create as many social messages as you want. We share each piece at least twelve times on our social platforms (twice on Facebook; six times on Twitter; once on LinkedIn; and three times on Google+), spanning different dates, according to our social sharing schedule.

Note: be sure to look out for errors in your social scheduling; as you can see in ours if we were actually posting this social message (instead of creating an example), our Facebook post wouldn't be going out from the Digital 22 account, which would be problematic. Make sure your dates, times, and "posting from" section is set up properly. You can edit the images, attach new ones, and make sure your links work as well.
HubSpot’s integration makes it really easy to share social messages. Write what you want to your target audience, and click “Schedule messages.” Those social messages will then be distributed on the days and times you’ve scheduled.
Tip: You can go into the social tool in “Publishing” and edit social messages, clone them, talk to your followers, look at all scheduled posts, and find out if any were unsuccessful. You can see the analytics of interactions and clicks too.
Editing Published or Scheduled Blogs

Even though you’d like to execute perfect copy, sometimes mistakes slip through the cracks. Maybe you need to change the CTA text and update it; maybe you need to add in a link; or maybe you need to fix a typo. Either way, click the “Edit” button, and it will take you to the editable blog text.

Once you’ve made the necessary changes, press “Update” and you’re good to go!

Final Thoughts
As you can see, scheduling and sharing a blog with HubSpot is simple and intuitive.
Read more about blogging:
- 10 Reasons Why I Love The HubSpot Blogging Tool
-
Delete Your Landing Pages! Why Pillar Pages Are The New Way Of Inbound
-
Inbound After Hours Podcast - Episode 1 - All Things Blogging; Frequency, Length, Traffic and Leads
Thinking about HubSpot?
Check out our comparison guide: HubSpot vs Drupal vs Wordpress. We contrast the three CMSs on over twenty different points of comparison. Discover which platform will work best for your marketing now.
